Simulate ONTAP is a virtual simulator created by NetApp for their ONTAP software and you can use it on both Windows and Mac systems.
Grap the files from NetApp’s website
You can download the simulator files from the Tools section of their support site (but you would need customer access at least to log in) and there are a few supporting files in addition to the main simulator OVA file:

Create the SIM VMs for each node
I am using VMware Workstation and the process of importing the OVA file is as simple as File / Open which creates a VM for the node. If you would like to simulate an entire cluster, like me, then you would need to repeat the process for each node.
Customize node2 (serial and sys id)
Importing the OVA file will create the nodes with identical serial numbers and therefore we need to customize node 2 first. Please press the space bar when the second node reaches this prompt during the initial boot:

Pressing the space bar will interrupt the above timer and display the VLOADER> prompt where we need to enter the following:
- setenv SYS_SERIAL_NUM 4034389-06-2
- setenv bootarg.nvram.sysid 4034389062
like this:

then we can use the printenv equivalents to ensure the values have been stored properly:
- printenv SYS_SERIAL_NUM
- printenv bootarg.nvram.sysid

at this point, we can type boot and press enter to continue the process and the boot is complete once the IP address for the node is displayed like this

since this is node 2, we won’t be accessing System Manager just yet – first let’s start node 1 and once it has fully booted we need to access the System Manager for node 1 using the relevant IP:

Create the cluster
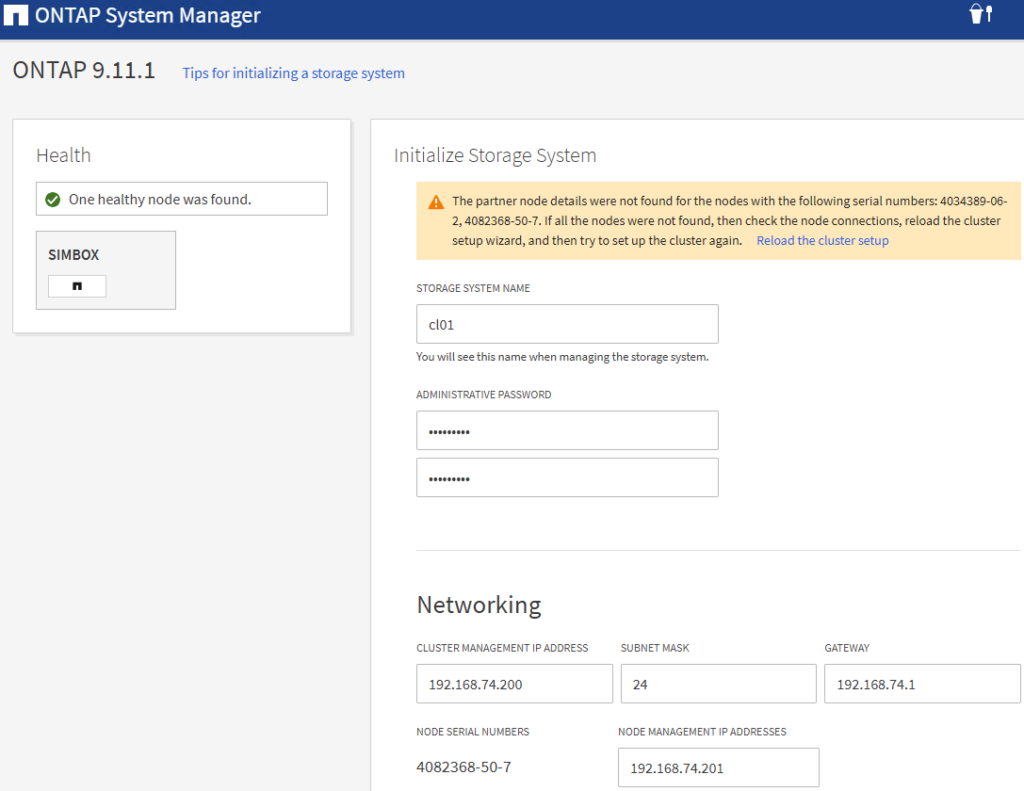
The first time we access the System Manager on node1, we will automatically land in the Cluster Setup wizard where we can fill in the following details and click Submit – this will create the cluster, set the admin password and configure the cluster and node management IP addresses for node1:

Join node2 to the newly created cluster
Our next step would be to login to the node2 CLI as admin (there is no password setup at this stage) and join the cluster using “cluster join -clusteripaddr 169.254.77.110” where the IP address we would have obtained from the System Manager of node1 (Network / Overview – choose any IP address within the Cluster IPspace):

once the operation has been completed successfully the following message will be displayed:

Disable root snapshots (optional)
Since this is a lab environment with a limited amount of free space, these steps will minimize the space used:
- run local
- snap delete -a -f vol0
- snap sched vol0 0 0 0
- snap autodelete vol0 on
- snap autodelete vol0 target_free_space 35
- snap autodelete vol0

repeat the process on node2
Create a management Interface for node2
I noticed that we don’t have a management interface for cl01-02:

and this is how we can create it

we can also delete the initial “*_auto” interface

Tiers
At the moment we only have one aggr0 per node, but more tiers can easily be created:

by accepting the recommendations, the unassigned disks will be used to create cl01_01_FC_1 and cl01_02_FC_1:

Install licenses
In my download, there was a file CMode_licenses_9.11.1.txt which contained the licenses.
To install them the process is straightforward and easiest using ONTAP CLI. The SIM licenses are the so-called legacy ones and you can install them one or more at a time like this:
- system license add -license-code <LICENSE_CODE>
- system license add -license-code <LICENSE_CODE1>,<LICENSE_CODE2>,<LICENSE_CODE3>
